Monday 9 December 2013

New Suppliers...

It's been a good start so far with our farm shop and to continue we have a new range of suppliers...

we have a beautiful chilli oil, especially nice drizzled over pizza, salads etc by Broken Spoon who makes not only this chilli oil but a range of cakes as well...


We also have a new range of Jams and Chutneys from Apple Paddock preserves. From traditional caramelised red onion chutney to the more exotic Mediterranean chutney and tantalising Gooseberry and Raspberry Jam there is something for everyone...


If you are looking for something to satisfy the foodie in your life then we also stock gift baskets from Foodiedirect who produce a delicious range of chutneys and jams, including apple and walnut chutney, and cranberry and clementine Jelly...


Not to mention, dry cured bacon, lamb and mint burgers and venison sausages...

Venison Bresaola...

A first for us at Redborne, as part of our new shop we decided to look at new suppliers and ended up swapping some pork for some Venison. Most of the venison was used to make game sausage but the loins were filleted and I decided to have a go at making Bresaola, an air dried meat traditionally made from beef.

Here is part 1:

We started by trimming all of the silvery sinews and making sure that we had only the leanest meat left over...


Then we needed the cure mix. In order to successfully cure an air dried meat it takes something a little special, a salt known as sodium nitrite. Commercially this is called 'Prague Powder Number 2' and is the curing agent along with salt and sugar.


To the curing agents spices and aromatics can be added and that comes down to taste. My curing mix was as follows:

100g Sea Salt
100g dark Brown Sugar
5g Prague Powder
Good helping of crushed black pepper
2 sprigs of rosemary


The cure is added to the meat, wrapped in a bag and left for a week, the process is repeated and only after this point is the meat ready to air dry...


Thursday 5 December 2013

What goes into making our products?...The making of Bacon...

With mass production and uniformity common in most products, even within our food it is often easy to forget the effort that goes into producing our staple goods.

Take the humble slice of bacon: Pink, Crisp and salty goodness. How does it get that good?


At Redborne we make our own using specially selected cuts of pork and traditional methods:
We start by weighing the pork, the salt that is rubbed into the meat must only be mixed at a specific ratio. Too much and the meat is unpalatable, too little and the uncured meat could turn rancid before the process is complete. The salt itself is not just any old salt from your kitchen table, the Sodium Nitrate gives the bacon its characteristic pink colour as well as its ability to last longer in our cupboards and fridges than pork.

Sugar, cure and spices (Coarsely ground)...

The salt is mixed at a ratio of 5% salt compared to the weight of the meat i.e. a 1 kg joint will use 50g of curing salt. To the salt we also add muscavado sugar that adds a sweet almost treacle note to the meat and a carefully selected blend of spices. Because the mix is not in a liquid and none is added this is known as a dry cure...


Pork rubbed in bacon cure ready to rest in the fridge...


The meat is left to cure for 5 days after which it has changed colour, in order to allow the flavour to develop the bacon is rinsed to remove any excess cure and then hung for at least another 7 days. As our bacon is dry cured as long as it is kept in cool conditions it could be left to hang indefinitely, as eventually it would resemble a Parma Ham.

Bacon hanging in the smoker...
The smoker full of oak chips...


After 7 days we smoke the bacon on site using oak or beech trimmings, this adds yet more flavour to the bacon. After resting for a further day the bacon is sliced, packed and ready for sale...

Making Black Pudding...

Always ones to try new things here at Redborne. It was decided to have a trial run at making black pudding. Here's how we did it and how it went...

Ingredients...

1 black pudding kit (Skins, blood, filler and seasonings)
1.3 kg of pork fat (Back fat is best)
1.980 kg of liquid (we used half warm water and half home brewed red wine)

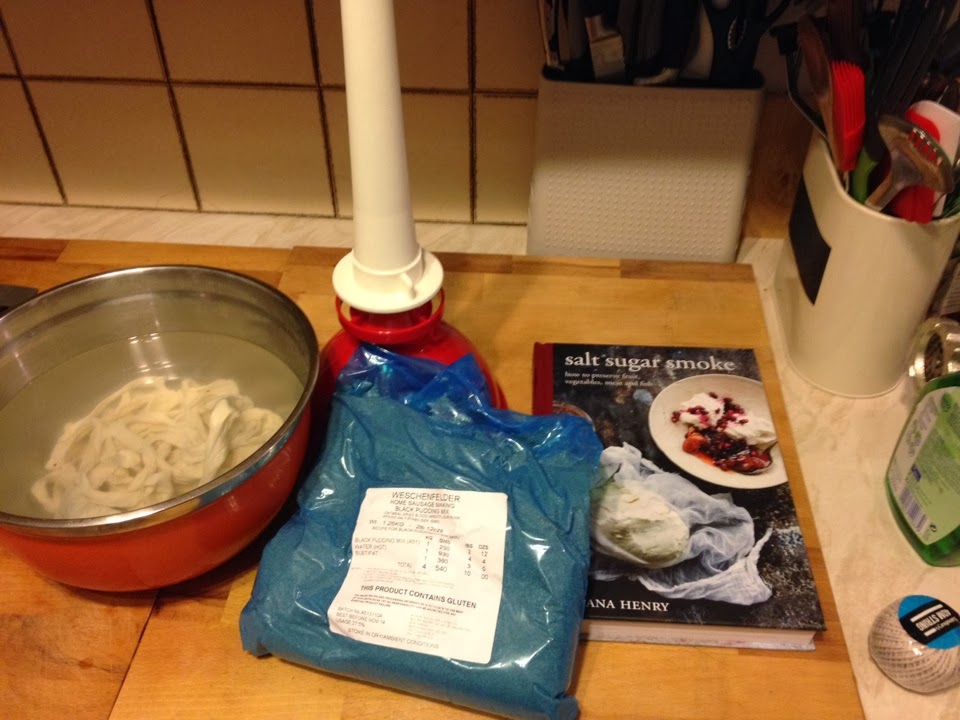
The casings to the left soaking in freshwater and pudding funnel to the rear with stuffing attachment...


Important equipment...

A funnel (We used a specific black pudding funnel), Ladle, large mixing bowl, string, kitchen towel...

The Method...

1. We soaked the skins or casings. The beef runners (part of the cows intestines) come packaged in salt. This makes them tough and hard to work with so at least an hour before starting it's best to get them soaking in plenty of fresh water. We also put a large pan of water onto simmer...

2. The fat. A major characteristic of black pudding we were desperate to replicate is the mixture of soft fats in the farce (Black bit) and chunks of fat visible when cut and cooked. We took our kilo of fat trimmings and half were minced on a coarse plate and half chopped finely by hand...

Hand Diced...
Minced fat...


3. The fat, pudding mix and warm liquid (Not hot otherwise the mix will start to cook, not cold otherwise it won't mix) must be mixed together, if the water is warm this will be much easier...

The Black pudding mix...

4. Once the mixture is incorporated leave to stand for about half an hour. While the mix is resting cut your skins (casings) to your desired length. We estimated 50cm lengths as this allowed a good curve, plenty of skin for forming knots and room for expansion...

5. Tie a knot in one end of the skin and feed the open end over the funnels tip or attachment. Once upright slowly start to ladle the mixture into the funnel. This should be done very slowly a ladle at a time as you must leave about 2 inches of empty casing for expansion and knotting...

The casing knotted at the end, fed over the stuffing nozzle...

6. Once filled (almost) remove excess air from the remaining casing and knot. Using string tie the two knots together to form the characteristic horseshoe shape. This looks nice and helps lift the puddings in and out of the cooking pot...

Knotted and ready for the pan...

7. Once knotted add to the stock pots and cook for at least 80 minutes. Do not leave too long or they may rupture...

8. Once cooked remove and leave to cool. It's worth noting even after 80 mins the puddings that are wet will appear brown not black it is only as they dry they turn a deep black. They may also still be a little soft as the fats will not be set...
 
9. Once cool they can be stored for up to a week in the fridge, frozen or of course enjoyed fried in a little oil or butter...
The finished article with the remaining salt from the casings visible on the skins...

Our black pudding kit came from http://www.weschenfelder.co.uk/